Thursday 16 May 2013

Thursday 16th of May 2013

A simple roast tonight, just a lovely piece of pork shoulder, some baked potatoes and one vegetable; some sprightly-looking spring greens that I couldn't resist when I was out shopping..

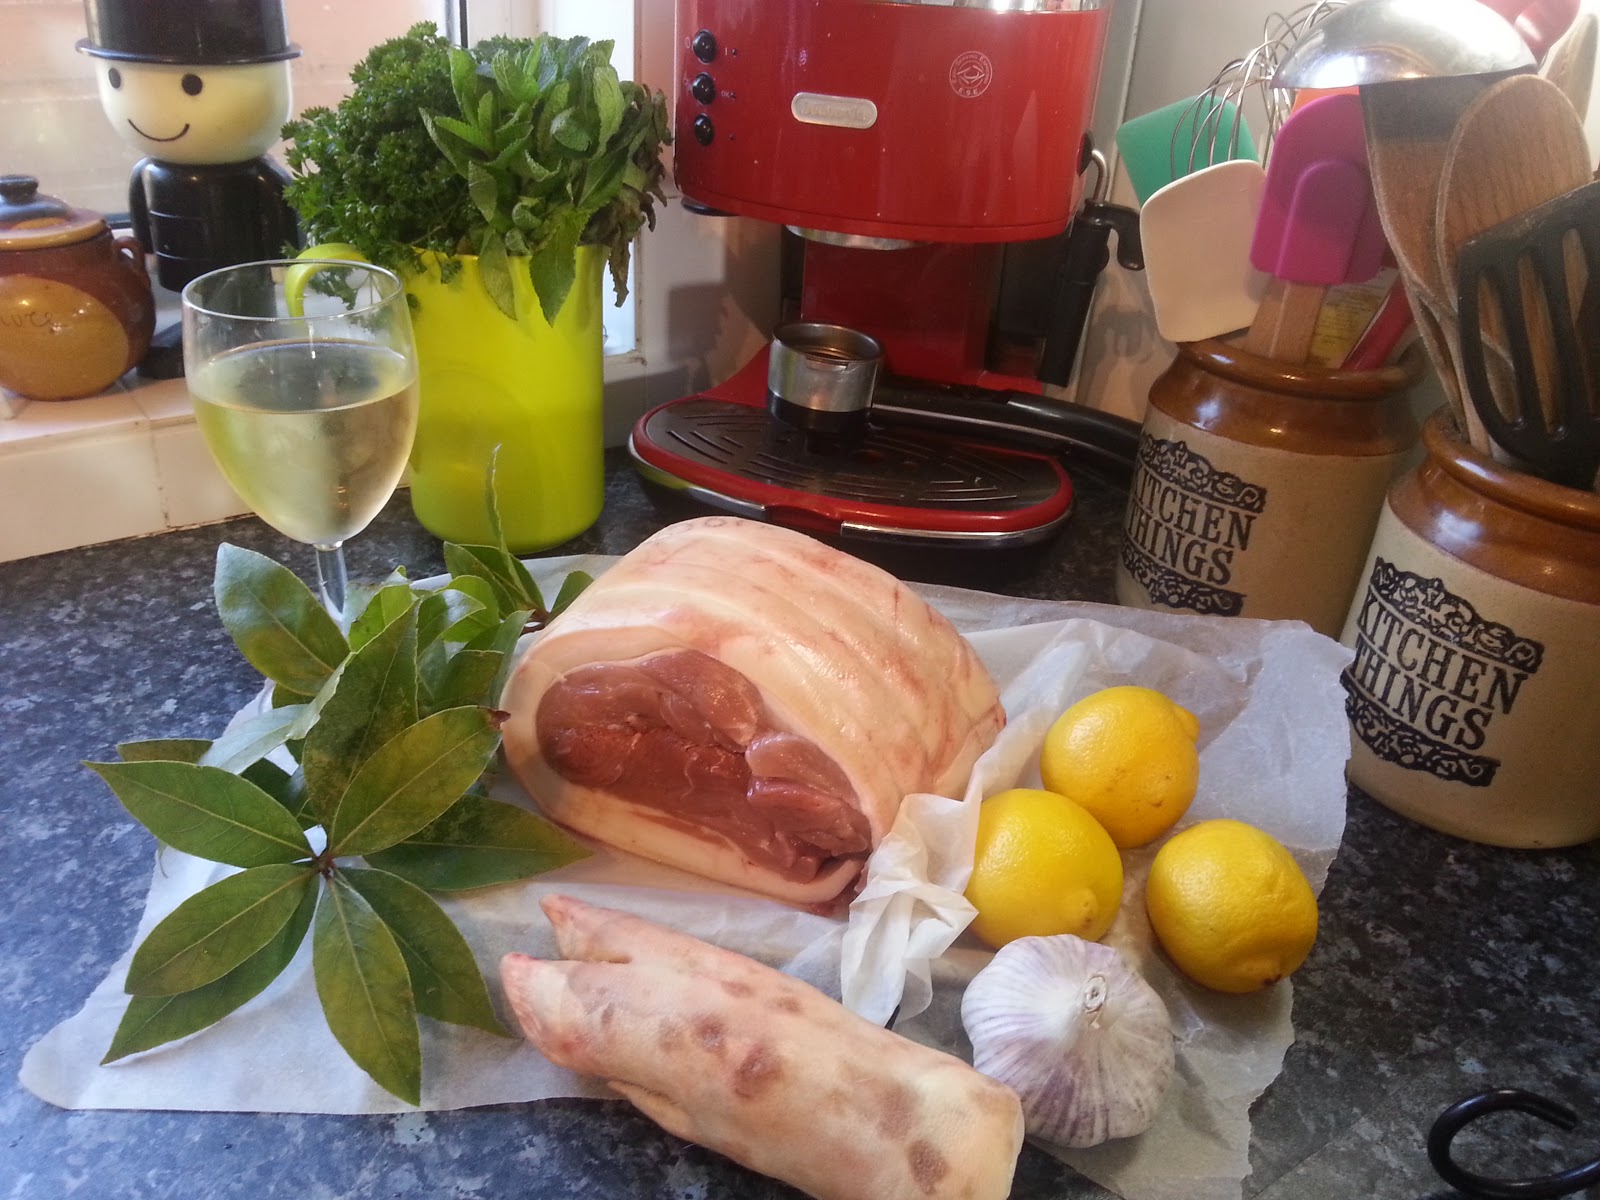
Take a whole head of garlic, the cloves separated but unpeeled, two or three lemons, quartered, and 3 shallots, skins left on and halved. Add to this several fresh bay leaves and, if you can, a pig's trotter, split. I get these easily from my butcher, and they cost next to nothing (and often actually nothing).  Rest the pork on top, I unrolled the joint to allow for quicker cooking and maximum output of crackling. Pour over a little oil, then sprinkle with crumbled dried bay leaves (I dry the leaves from our bay tree in the microwave, giving them 30-second bursts until dry and crunchy) and a good grinding of white pepper. Obviously the cooking time will vary based on the size of your joint; I work on 20 minutes per pound (or 450g, if you prefer) in a hot oven.

Pouring a glass of white wine over the pork after about 20 minutes and later still adding 350ml, give or take, of stock (I used pork stock, but chicken would be fine too, as well as fine crackling (the secret to which, strange as it seems, is regular basting with the juices from the roasting tin) it produced an easy gravy that was not as thick and meaty as some, but aromatic and flavoursome with a kick of sharpness from the lemon.  Hubby wasn't as keen on this as he is on my more usual thicker and 'meatier' gravies, but the children and I adored it.  When the pork is cooked and resting, strain the juices into a saucepan.  Add a splash of boiling water to the roasting pan and, with a wooden spoon, scrape up the 'burny'- looking tasty bits from the bottom.  Strain this liquid into the pan too, then cover and boil hard for a few minutes to emulsify the gravy.  Season to taste and pour into a warmed jug.

Serve the pork, sliced, with shards of crackling, baked potatoes and simple steamed greens.  Perfect.

Cath xx


Sunday 12 May 2013

Sunday 12th of May 2013

Today we're having a lazy, chilled-out day; the children have a birthday party to go to later on and my lovely, lovely Husband has relieved me of the need to take them, meaning that I will - for once - get a bit of actual weekend time to myself, and at home to boot!

This morning I've done only a very little kitchen pottering, mainly making the boys' lunch - baked sweet potatoes with cream cheese and pesto filling - but also refreshing my bottle of garlic vinegar and making up a fresh batch of seasoned salt, which I use often.  It started out as 'chicken seasoning' (and is, still, superlative scattered over chicken before roasting), but since finding more and more uses for it (not least scattering over potatoes before baking, whether whole or cut up), I've taken to calling it seasoned salt, though in reality it's more like salty spice-and-herb-mix. That hardly trips off the tongue though, does it?

My Seasoned Salt


9 tbsp fine sea salt
6 tsp paprika
1 tbsp garlic salt
1 tbsp dried thyme
1 dsp dried oregano
1 tsp English mustard powder
1 tsp garam masala
1 tsp celery seed
1 tsp (freshly ground) black pepper
1 tsp dried dill

Mix everything together.  I tend to give it all a good whirl in the processor, to eliminate any streaks of salt. Bung it in a jar.  Use liberally and often.

The garlic vinegar is a precious substance that I was first introduced to by the late Laurie Colwin's wonderful book More Home Cooking: A Writer Returns to the Kitchen, which I bought in 2004 when I was pregnant with our first child. Ibecomes, over time, a liquid essence of garlic which can be dangerously addictive.  Poke 3 peeled garlic cloves into a clean glass bottle and top up with cider vinegar.  I imagine you could successfully use a wine, sherry or even rice vinegar instead, but I never have. When the bottle is nearly, but not quite, empty I like to strain out the remaining vinegar and replace the garlic cloves with fresh ones before returning the 'old' vinegar to the bottle and topping up with 'new'. Hope you've enjoyed your weekend, and Happy Mother's Day to moms in the U.S.A. (and everywhere else too, we deserve it!)

Cath xx

Saturday 11 May 2013

Saturday 11th of May 2013

I love avocados.  Popping a couple in my shopping basket and bringing them home, to be tucked away in a brown paper bag on the kitchen counter until they are perfectly ripe has become something of a weekly ritual.  Sliced into salads,  quickly mashed to spread on a tortilla for a fast quesadilla or just eaten, greedily,  with a splash of vinaigrette,  I've yet to find a way to eat them that I've not liked. Jeffrey Steingarten informs me, in The Man Who Ate Everything, (a corker of a book, by the way, and highly recommended) that "Brazilians eat avocados for dessert,  mashed up with sugar". Haven't tried it yet, but maybe one of these days I will...

Last night, for supper, I grilled a stack of lamb leg steaks and made a couple of different salads to go with.  In the interests of gilding the lily,  I also toasted some pitta and knocked up a batch of this gorgeous avocado houmous.  Smooth and mildly nutty-tasting, this knocks guacamole out of the park as far as I'm concerned, and is A.Mazing with lamb.  It also has the huge advantage of staying perfectly green for days,  rather than mere minutes,  so can be handily stashed in the 'fridge for hungry moments (or, quite frankly, for those standing-by-the-open-'fridge-with-a-spoon moments!).  Cooking the already-cooked, tinned chickpeas for a few more minutes makes for a desirably smooth houmous, plus you can fish out as many of the papery skins as possible (they seem to detach easily when cooked) for an even better texture.

Avocado Houmous

410g can chickpeas,  drained and rinsed well
2 ripe avocados,  flesh scooped out and roughly chunked up
1 dsp tahini
1/2 - 1 tsp salt
juice of a lemon
avocado oil, as needed (and see below)

Put the drained,  rinsed chickpeas into a saucepan and cover with water.   Bring to the boil and cook for 3 minutes,  or until very soft.  Scoop out as many of the skins as you can or want to.   Drain and allow them to steam dry for a few minutes.  Put everything, bar the oil (and you can use a different mild oil if you want, I just always use avocado oil here) into the processor and whizz to a smooth and creamy looking paste.  Drizzle in oil to achieve the texture that you want,  I prefer my houmous to be on the softer side, rather than standing up in stiff peaks.  Serve immediately, or seal in a tub in the 'fridge for later.

Cath xx

Saturday 27 April 2013

Saturday 27th of April 2013

Another lovely sunny day here today, so a light lunch was called for, in order to allow for maximum time spent in the garden and minimum time spent actually having to do anything.  Baked eggs are, anyway, a bit of a weekend lunchtime favourite at Distracted Towers and this is a lovely version.

Baked Eggs on Mushrooms and Spinach

large lump of butter
200g chestnut mushrooms, finely chopped
150g spinach leaves, washed and shaken dry
1 tbsp whipping cream
2 tbsp chopped fresh tarragon (optional, and see below)
8 small-to-medium-sized eggs
25g grated parmesan cheese

Preheat the oven to 180ºc. Melt the butter and fry the mushrooms over a high heat.  I have some rather wonderful porcini mushroom powder called, endearingly, Shake O'Cini, and I added a few shakes here to boost the mushroom flavour, but you don't have to be as elaborately specialist if you don't want to be..!  When the mushrooms are brown and almost 'squeaking' as you stir them, pack the spinach into the pan and put on the lid.  Remove from the heat and leave for a few minutes.  Remove the lid, stir well and then replace the lid for a few minutes more until the spinach is well wilted.  Tip the vegetable mixture into a sieve over a bowl, and press down on it with a spoon, allowing the scant, but flavoursome, juices to drain through the sieve.  Stir the cream into the strained juice.  You can just as easily use double cream instead, but whipping cream is what I mostly have in the 'fridge.


Arrange the vegetable mixture in shallow ovenproof dishes and make a 'hole' for each egg, as shown in the picture, left, and scatter over the chopped tarragon, if using.  Tarragon is a great addition to the triumvirate of mushroom, spinach and egg, but leave it out if you don't have it, or don't fancy it.  There's no mileage in using dried tarragon here... Put the dishes onto a baking tray (I lined mine with one of my silicon mats to provide a non-slip surface, stopping the dishes from sliding around on their short journey to the oven. Crack each egg into one of the 'holes'.  Drizzle over the cream-swirled cooking juices, then scatter over some parmesan.

Bake for 10-12 minutes, then remove from the oven.  The eggs will continue to cook in the dishes, so err on the side of their being slightly underdone when you take them out of the oven, rather than risk overcooking them.  Serve with a nice loaf of bread and some crunchy salt to sprinkle over the eggs.

Cath xx  

Friday 26 April 2013

Friday 26th of April 2013

 Well, Happy Friday everyone!  After a gruelling week, I was (well, to be frank, we all were) ready for something wonderful.  Duck is something that I crave as a special treat, spoiling supper; that fatty richness, that crisp skin, it gets me every time... Roasting duck legs over potatoes provides, for me, the best of both worlds; the soft, creamy potatoes with a crisp and  flavoursome carapace of crunch, along with the rich, meaty flesh of the legs provides the perfect Friday night supper. A vibrant dish of mixed green veggies sits perfectly alongside...

Be sure to prick the skin covering the fatty deposits on the duck legs prior to roasting;I use a large safety pin kept for the purpose, but a darning needle or fine skewer would do just as well.  Sit the duck legs, skin side down in a tray, on top of your parboiled potatoes for the first twenty minutes of the forty-five that the dish will need in total.  This will allow the gorgeous duck fat to ooze and seep out of the legs to flavour your roasties.  Keep basting the meat and potatoes and it will surely become its own reward...

For a truly fabulous accompaniment to the duck and potatoes, try this brilliant green vegetable medley, that I have shamelessly pinched from my Mum; the best cook I know, and the undisputed maker of the world's best roast potatoes and gooseberry mousse.  Love you, Mummy!

Cook handfuls of fine green beans, broccoli florets, chopped asparagus, sugar snap peas and (frozen) soybeans until each is tender.  Serve combined in a large dish.  I, personally, like to swish over some cold-pressed rapeseed oil just before serving and add a smattering of Maldon salt, for crunch and savour.  This medley makes for a fabulous lunch the following day if you eschew any leftover cooked broccoli (add it to the soup box) and crumble over some feta and, perhaps, a few toasted walnuts.  Nommy weekend treats!

Cath xx

Thursday 25 April 2013

Thursday 25th of April 2013

Tonight we ate Toad-in-the-Hole for supper,  with gravy and a buttery mound of sweetcorn.  The toad was hugely boosted by the presence of a pack of pancetta languishing in the 'fridge, the slices just waiting, begging, to be wrapped around the chipolatas before they started their toad-ly journey... Pop the sausages in a roasting tin with some lard or dripping,  heat until sizzling and then pour over a simple batter; a pint of milk beaten with two eggs, then mixed with 200g of plain flour and a good pinch of salt. 40 minutes in a hot oven and clean plates all round!

Cath xx

Sunday 21 April 2013

Sunday 21st of April 2013


The weekend has been very half-and-half here.  Yesterday (unlike today, grr!) the weather was glorious and we spent all morning and a large chunk of the afternoon in the garden.  I eschewed the chicken pie that I'd planned to make for lunch and instead served up a huge bowl of chicken salad with bacon, avocado, green beans and new potatoes.  Scattered with tarragon and dressed with my all-purpose honey mustard dressing, it was a hit with everyone present and much lighter eating than pie would have been on a warm day.


Of course, the abandonment of my pie plans did mean that there was a sheet of ready-rolled puff pastry now languishing, without purpose, in the 'fridge.  With leek and potato soup on the cards for lunch today, I decided to knock up some Blue Cheese and Hazelnut Palmiers to go with it

My Latest Leek and Potato Soup


lump of butter
6-8 thin slices of pancetta, chopped
6 thin leeks, halved and sliced
2 large potatoes, peeled and chopped
1.2 litres chicken stock
2 bay leaves
white pepper

Melt butter in a large pan, fry the pancetta for a few minutes to let the fat begin to run, then turn the prepared leeks in the juices until well coated. Add the potatoes, mixing in well, then pour in the stock, add the bay leaves and bring to the boil. Cover and simmer for 30 minutes, until the vegetables are really soft. Remove the bay leaves and purée. I use my BAMIX with the 'C' blade, but use what you like.  Season with white pepper only (the pancetta is, I feel, quite salty enough).

Now for the accompaniment.  Palmiers are dead easy to make with a ready-rolled sheet of puff pastry and the folding is straightforward.  I've taken loads of pictures to show you what I mean, because I think it would be very difficult to explain clearly with words alone.  I hope you give them a go, you can change the fillings easily to suit yourself, my boys are rather keen on pesto palmiers with extra pine nuts and parmesan.  Just remeber you need something 'spready' and one or two 'scattery' things and you're away...

Blue Cheese & Hazelnut Palmiers

150g Danish Blue cheese, at room temperature
25g unsalted butter, really soft
handful of hazelnuts, two-thirds chopped roughly, one-third finely


Mix the crumbled cheese and the butter together, mashing and stirring to form some semblance of a paste.  Using three-quarters of the cheese mix, dot teaspoons of this across the whole sheet of pastry, spreading it out as best you can , then scatter over the roughly chopped nuts.  Fold the long edges of pastry into the centre.

Now spread the remaining cheese over the uppermost surface and sprinkle with the finely chopped nuts. Fold the entire sheet in half (I use my silicone pastry mat to help), then wrap it up and chill it for at least an hour to firm up.

When it's had a good rest, cut the log, with a very sharp knife, into half-centimetre slices.  Put these, well-spaced and as shown, onto a lined baking sheet (parchment is absolutely fine and dandy if you don't have silicone mats) and bake for 25-30 minutes at 180ºc until golden, crisp and toasty.

Remove the palmiers to a cooling rack as quickly as you can.  


These are good either warm or cold; they are fabulous to go with drinks before dinner and keep for a few days in a tin (or they would, if my lot weren't so flaming greedy..!).  You can also prepare the logs, slice them and freeze the slices to cook from frozen. Just allow a little extra cooking time.

Cath xx

LinkWithin

Related Posts with Thumbnails